Follow Me On Social Media!

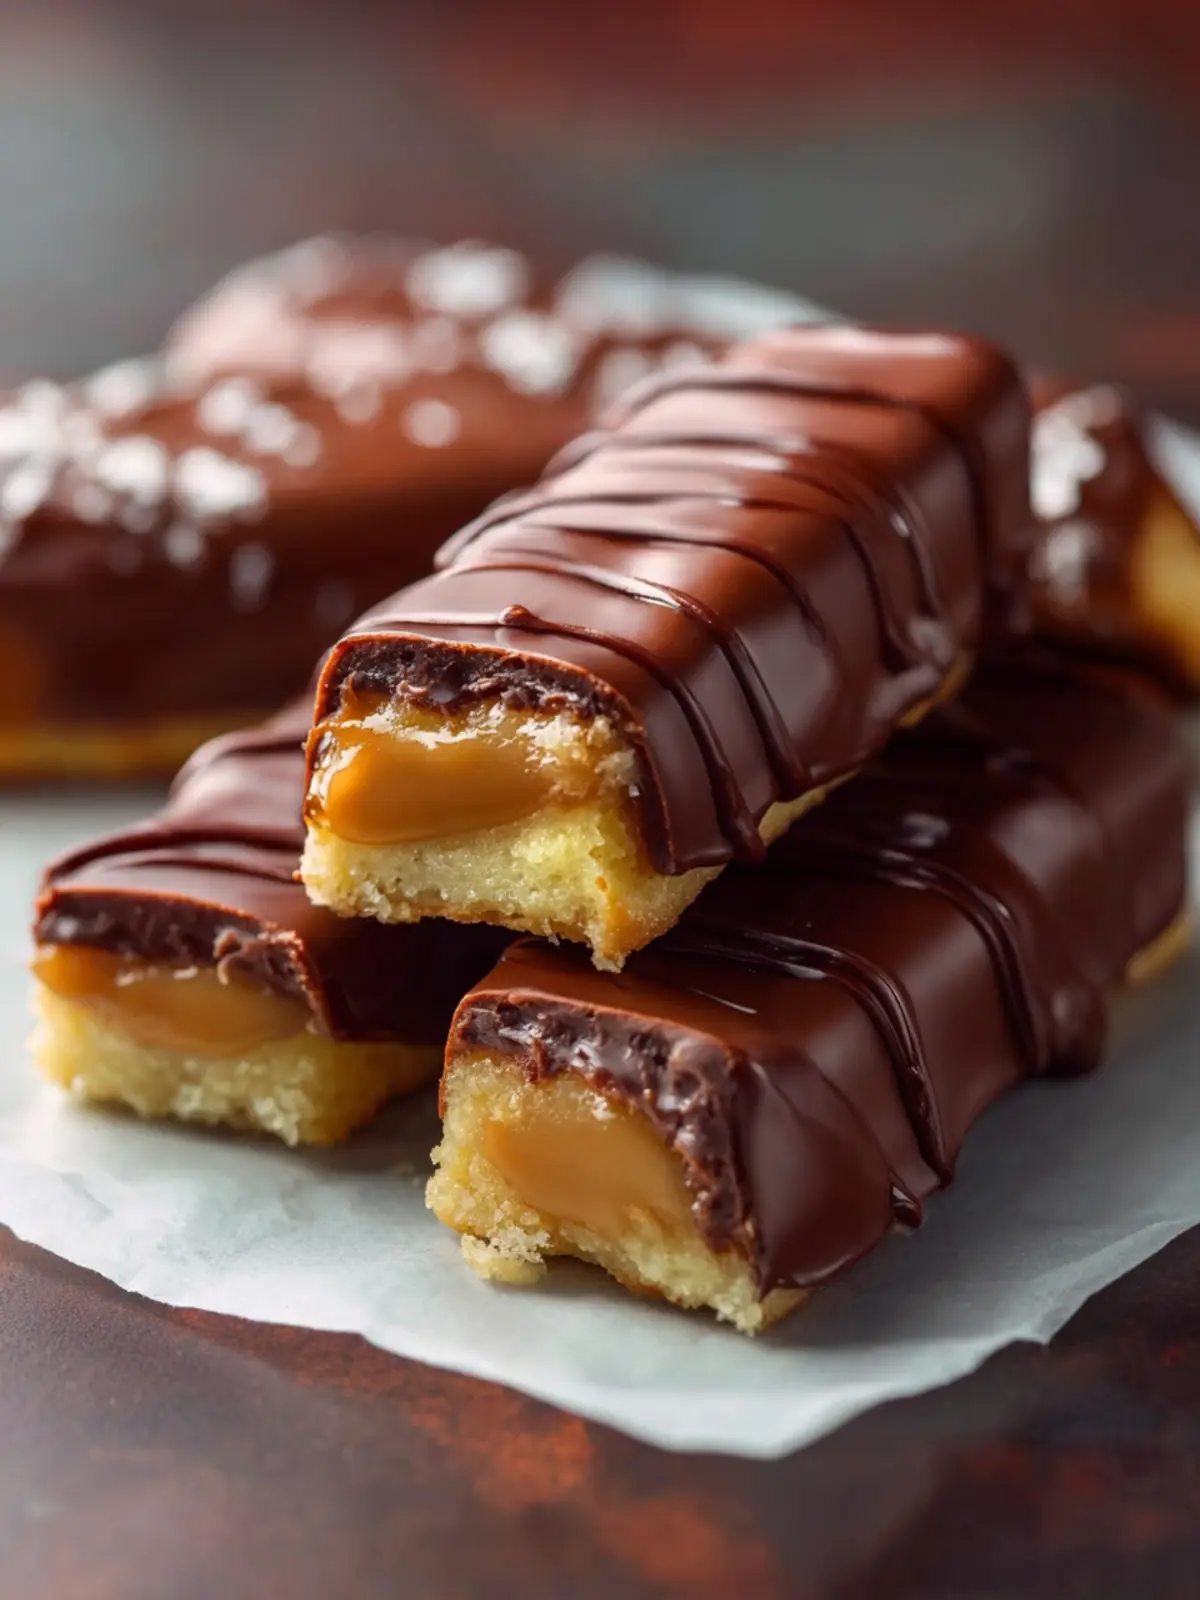
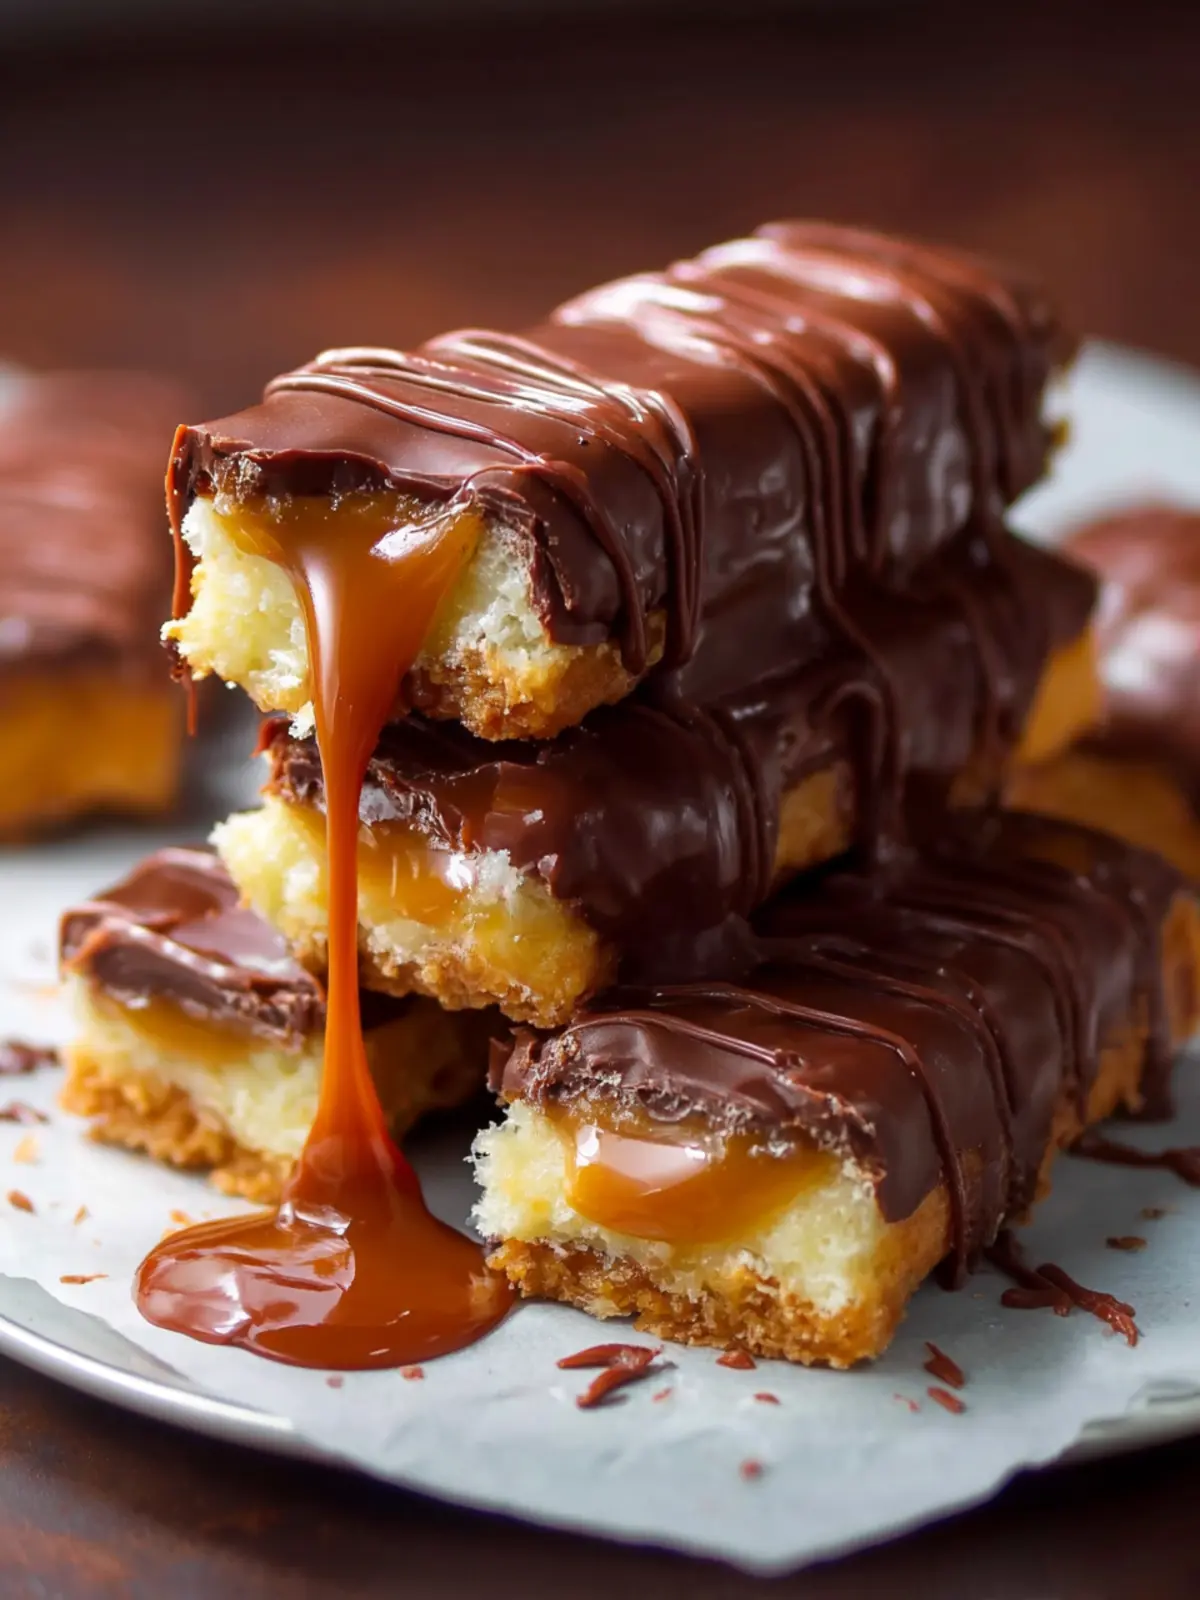
Homemade Twix Bar Recipe: Irresistibly Chewy and Crunchy Delight
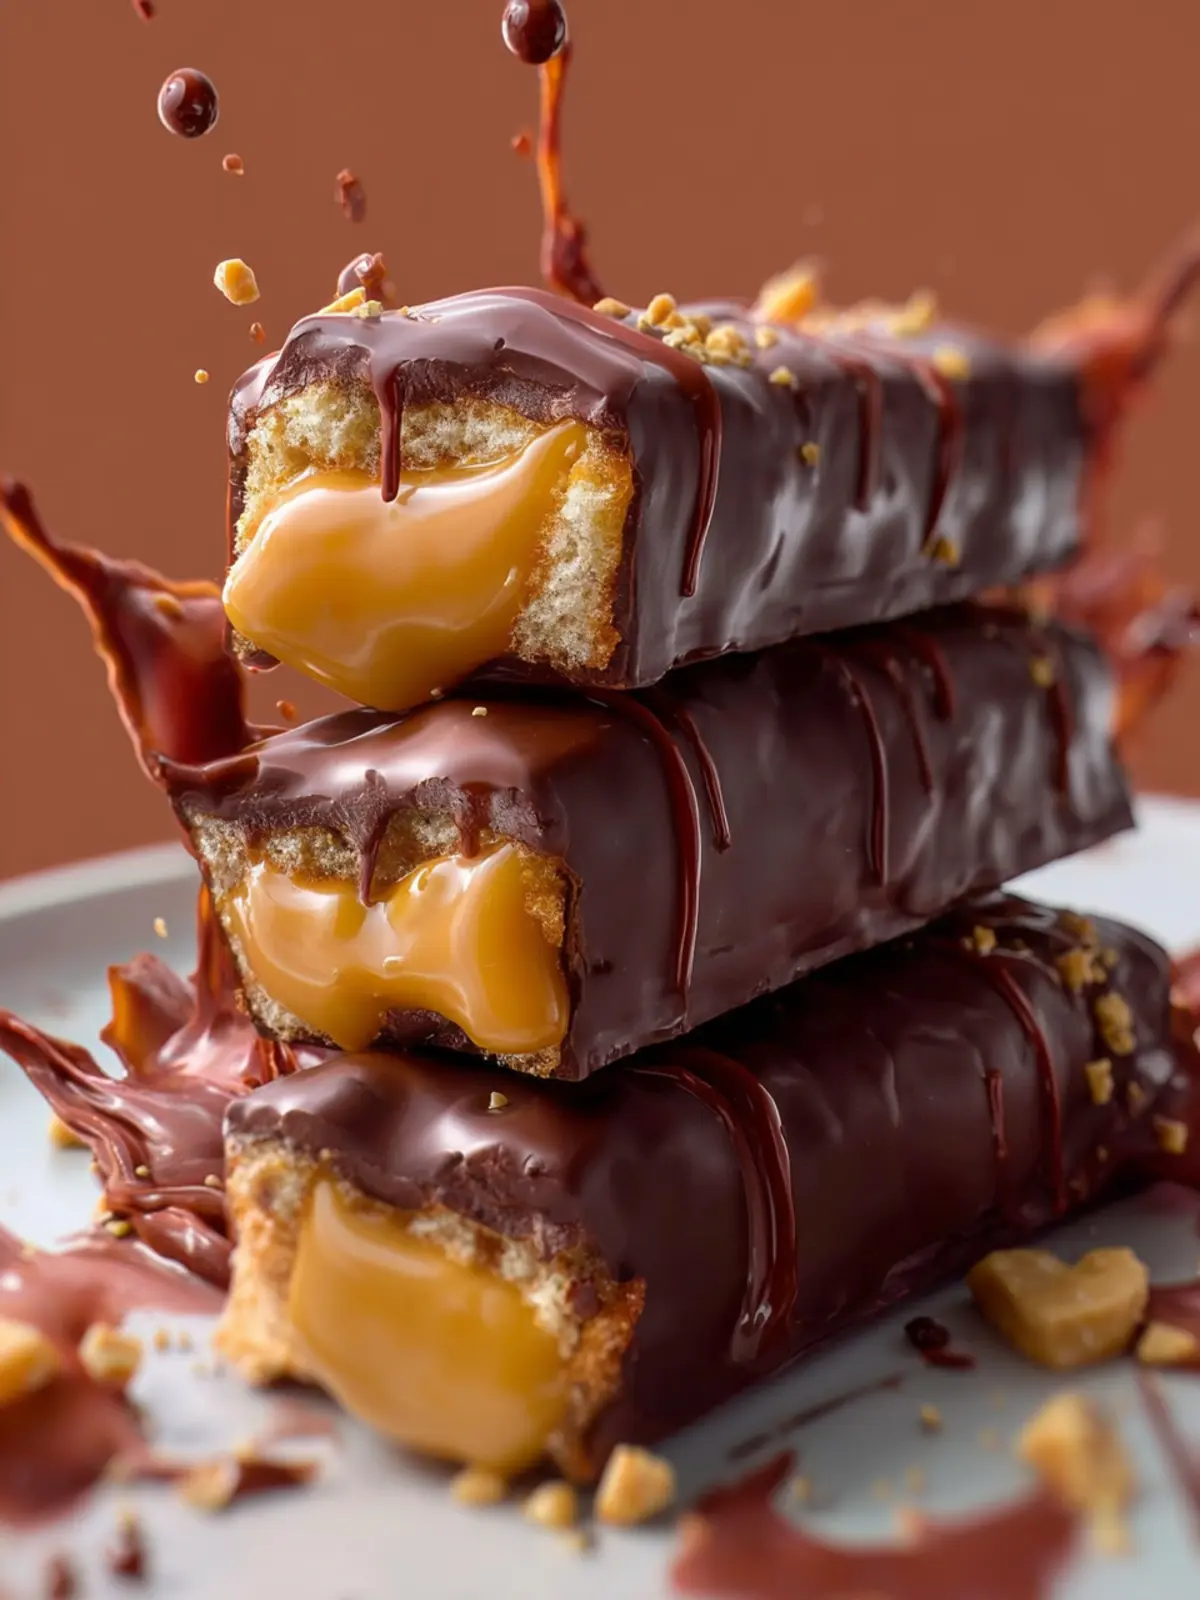
Introduction to Homemade Twix Bar Recipe
Imagine biting into a rich, chocolate-covered bar that brings back memories of childhood treats but made even better in your own kitchen. Yes, that’s the magic of the homemade Twix bar recipe! The combination of shortbread, gooey caramel, and luscious chocolate creates an indulgent snack that’s impossible to resist. What’s even more delightful is that making these bars from scratch allows you to customize them to your liking—fancy a sprinkle of sea salt on top, or perhaps a hint of flavored extract in the caramel? The possibilities are endless.
If you’ve ever craved that perfect balance of crunch, chewiness, and sweetness found in store-bought Twix, creating your own version at home can feel like unearthing a hidden treasure. The satisfaction of crafting your own treats—while knowing exactly what ingredients have gone into them—adds a layer of enjoyment that simply can’t be replicated with store-bought candies.
To get started, you’ll need to gather some key ingredients that each play a vital role in building the delightful flavor profile of your homemade Twix bars. Imagine having the comforting scent of buttery shortbread wafting through your kitchen as it bakes to golden perfection. The rich, silky caramel will melt even the coldest of hearts, and when it all comes together, it’s nothing short of a sweet symphony.
What makes homemade Twix bars irresistible?
-
Shortbread Base: The crumbly, buttery texture of the shortbread is essential. It’s not just a base; it’s a flavor-filled foundation that perfectly complements the other components.
-
Luscious Caramel: No Twix would be complete without that gooey layer of caramel. Made from scratch, it’s not only freshly made but also customizable in flavor.
-
Smooth Chocolate Coating: The final enveloping of chocolate provides the finishing touch, adding richness and a delightful snap.
Each of these layers melds beautifully, providing a balance that’s crunchy, creamy, and utterly delicious. With a little time and the right ingredients, you can experience joy in every bite. So roll up your sleeves and let’s dive into crafting these mouthwatering treasures!
Key Ingredients for Homemade Twix Bars
Creating your own homemade Twix bars is not just a delightful culinary adventure; it’s an experience steeped in nostalgia and flavor. Here’s a rundown of the key ingredients that will make your bars irresistible.
-
Shortbread Cookies: The foundation of any great Twix is the cookie. I prefer using butter for a rich, crumbly texture that melts in your mouth. You can also explore using a gluten-free blend if that suits your diet better.
-
Caramel: You can’t forget the gooey goodness! Homemade caramel gives these bars that signature sticky sweetness. Make sure to cook it right—too soft won’t set, while too hard turns into candy.
-
Chocolate: For that luscious outer layer, use high-quality milk chocolate. It balances beautifully with the salty shortbread and sweet caramel, creating that perfect flavor harmony.
-
Salt: A pinch of salt can elevate the flavors, enhancing the sweetness of the chocolate and caramel. It’s a small addition that makes a big difference.
With these key ingredients, you’re on your way to recreating your favorite chocolate bar in a uniquely personal way!
Why You’ll Love This Homemade Twix Bar Recipe
Imagine the nostalgia of biting into a Twix bar as a child, the delightful combination of crispy cookie, smooth caramel, and silky chocolate melting in your mouth. With this homemade Twix bar recipe, you can easily recreate that magic in your kitchen, and trust me, once you take a bite, you’ll be hooked!
Elevate Your Snack Game
Homemade treats have a unique charm, and creating your own Twix bars allows you to control the ingredients. You can opt for high-quality chocolate and real butter, ensuring a flavor that store-bought can’t beat. Plus, there’s something incredibly satisfying about making candy from scratch – you’ll impress your friends and family with your culinary skills.
Perfect for Any Occasion
Whether it’s a casual movie night, a birthday celebration, or simply a cozy afternoon at home, these Twix bars fit right in. They make wonderful gifts and party favors, wrapped in pretty paper or served on a fancy platter.
A Fun Cooking Experience
If you enjoy being hands-on in the kitchen, this recipe is a fantastic project. Each layer—cookie, caramel, and chocolate—requires a bit of attention but is completely manageable. You’ll find joy in the process, and the end result will be well worth the effort. So roll up your sleeves and prepare to fall in love with your very own homemade Twix bars!
Variations on Homemade Twix Bars
Crafting a delicious batch of homemade Twix bars opens the door to a world of flavors. These treats may be a classic, but there’s no harm in experimenting! Have you ever considered putting a twist on the traditional recipe? Here are a few delightful variations to spark your creativity.
Flavor Infusions
- Nutty Bliss: Swirl in some almond or hazelnut butter with the caramel layer. This not only enhances the richness but adds a delightful nuttiness.
- Peppermint Delight: A drop of peppermint extract in the chocolate layer can turn your homemade Twix bars into a festive treat perfect for the holidays.
Crust Alternatives
- Oatmeal Base: Instead of a standard biscuit crust, try using ground oats for a chewy texture. This variation is great for those who enjoy a heartier feel.
- Chocolate Cookie Crust: Swap out the biscuit for chocolate wafer cookies to create a chocolate lover’s dream.
Toppings and Finishing Touches
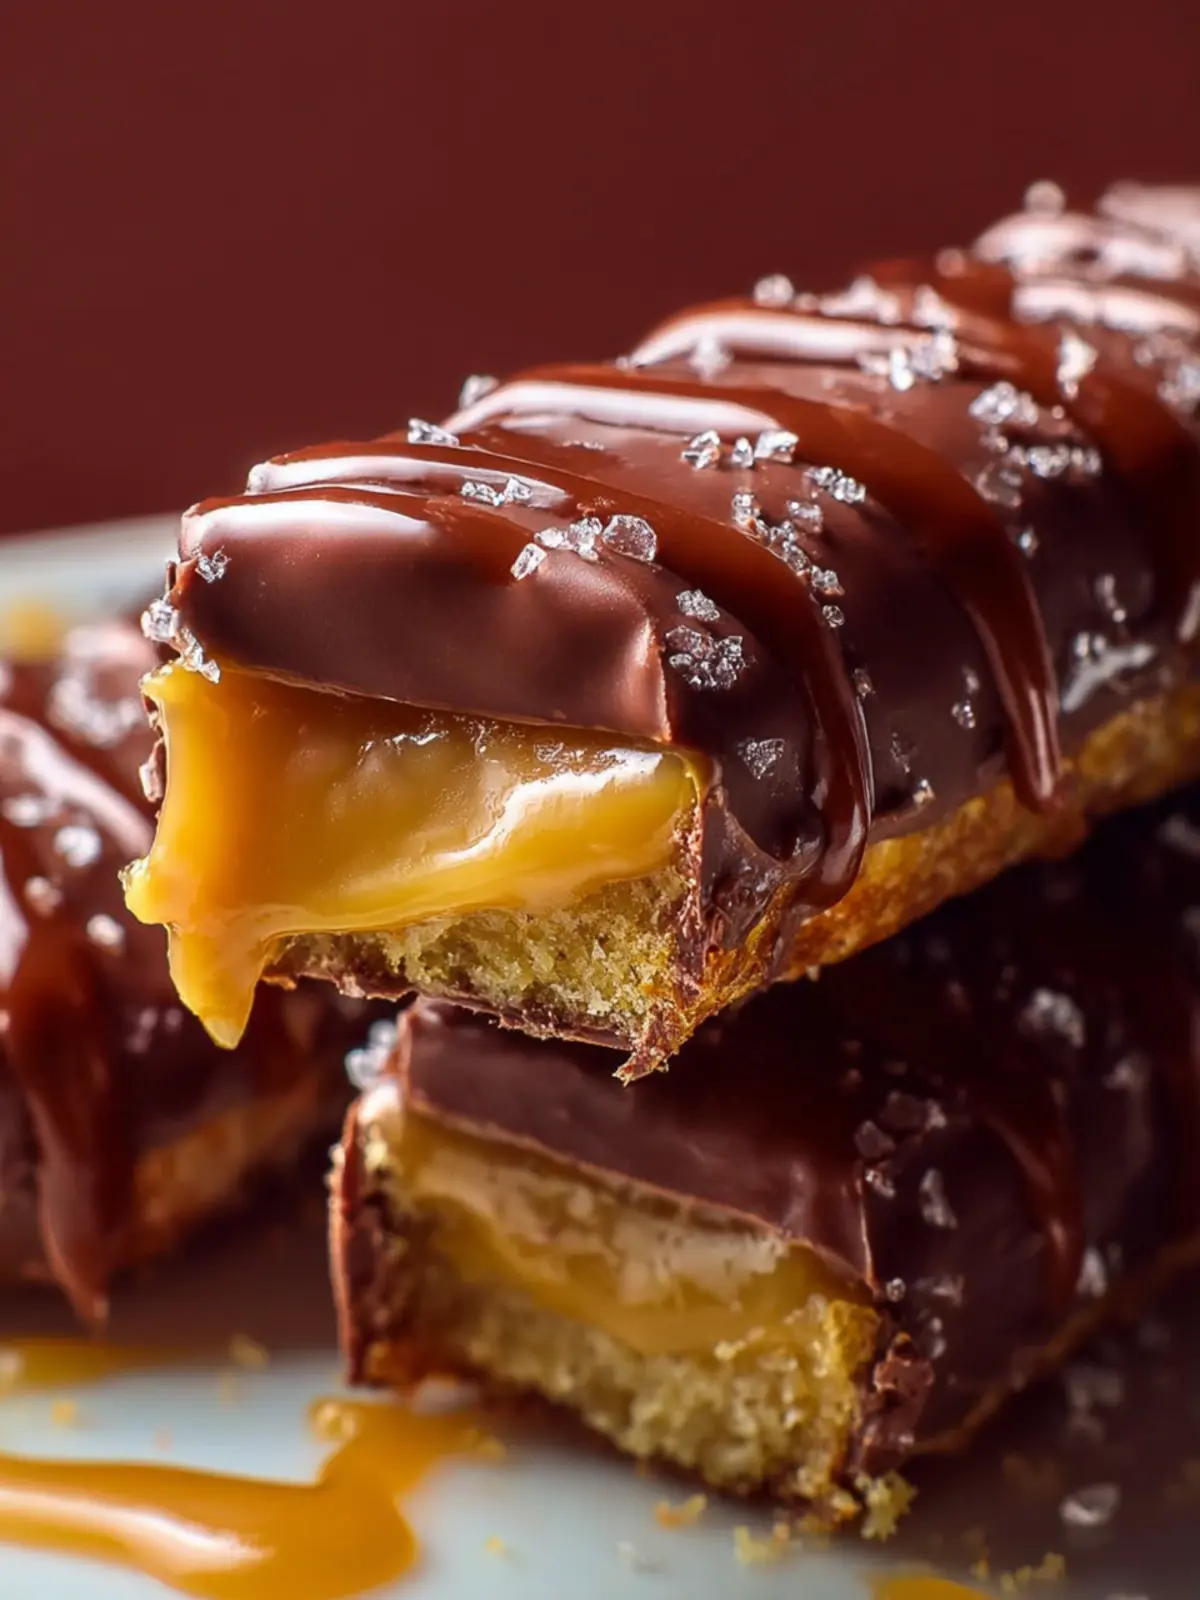
- Toppings Galore: Consider drizzling white chocolate or even sprinkling sea salt over the chocolate layer for an added burst of flavor.
- Nut Toppings: For a crunchy finish, sprinkle chopped nuts like pecans or walnuts on top before the chocolate hardens.
These variations not only keep your homemade Twix bars exciting but also allow you to cater to different taste preferences. So, which version will you try first?
Cooking Tips and Notes for Homemade Twix Bars
Creating your own homemade Twix bars can be a delightful adventure, especially when you nail the balance of texture and flavor. Here are some important tips to keep in mind while crafting your delicious treat.
Choose Quality Ingredients
- Chocolate: Opt for high-quality milk chocolate for coating your bars. A richer chocolate enhances the overall flavor profile, making each bite more indulgent.
- Caramel: If making your caramel from scratch feels daunting, don’t hesitate to use store-bought caramel candies. They can save time without compromising taste.
Get the Perfect Cookie Base
- Chill the Dough: After you mix your cookie dough, chilling it for at least 30 minutes will help it maintain its shape while baking. This will result in a perfect, crunchy cookie that provides the ideal contrast to the gooey caramel.
- Even Layering: When pouring your caramel over the cookies, aim for an even layer. This ensures each bite is consistently delicious.
Don’t Rush the Assembly
- Cooling Times: Be patient! Allow each layer to cool properly before adding the next. Melting chocolate over a warm layer can lead to a messy finish.
- Cutting Technique: Use a sharp knife to slice your bars. Warming the knife under hot water and drying it off can help achieve clean cuts.
By paying attention to these details, your homemade Twix bars will be both visually appealing and exceptionally tasty. Enjoy your kitchen escapade!
Serving Suggestions for Homemade Twix Bars
Bringing your homemade Twix bars to life is just the beginning—it’s time to elevate the experience with some delightful serving suggestions. Imagine hosting a cozy movie night or a casual gathering with friends while serving these delectable treats.
-
Chocolate Drizzle: For an extra touch of elegance, drizzle melted chocolate over each bar before serving. This not only adds visual appeal but also enhances that rich chocolate flavor we all adore.
-
Pair With Coffee: The dessert’s sweetness pairs beautifully with a bold cup of coffee or espresso. Consider serving a mini coffee bar alongside your bars, complete with cream, sugar, and flavored syrups for added flair.
-
Presentation: Arrange your homemade Twix bars on a rustic wooden platter or a chic cake stand. Garnish with a few sea salt flakes or chopped nuts for a bit of crunch and style.
-
Storage Tip: If you have leftovers, stack them neatly in an airtight container, separating layers with parchment paper. This keeps them fresh and makes for a great grab-and-go snack during the week!
These serving ideas will ensure that your homemade Twix bars are not only a hit but also create memorable moments.
Time Breakdown for Homemade Twix Bars
Creating your own homemade Twix bars is like a delightful baking adventure that leads to a sweet reward. Knowing how much time you’ll need allows you to enjoy every step of the process. Here’s a straightforward time breakdown to help you on your journey:
Preparation time
Getting ready to make these luscious bars takes about 20 minutes. It’s all about gathering your ingredients and getting everything prepped.
Baking time
The cookie base needs about 15 minutes in the oven. This is where the magic starts, as the aroma begins to fill your kitchen.
Chilling time
To achieve that perfect texture, allow your bars to chill for 1 hour after assembly. This step is crucial for a firm, satisfying bite.
Total time
All in all, you’re looking at around 1 hour and 35 minutes from start to finish. Trust me, the wait will be worth it when you take that first bite!
Nutritional Facts for Homemade Twix Bars
Crafting your own Homemade Twix Bars not only brings a delightful treat to your kitchen but also gives you insight into their nutritional value. Here’s a breakdown of what you can anticipate as you indulge in these chocolatey delights.
Calories
A single homemade Twix bar comes in at approximately 180 calories. While they’re a treat, being aware of the caloric content can aid in your snacking choices.
Protein
Each bar contains around 2-3 grams of protein, which can be a delightful bonus considering their sweet nature. Protein helps keep you full, so they can be enjoyed as a satisfying pick-me-up during the day.
Sugar Content
With about 15-20 grams of sugar per bar, these homemade treats are undoubtedly on the sweeter side. Eating them in moderation can strike a balance between enjoying a delicious dessert and maintaining a healthy lifestyle.
Now that you have the nutritional facts, you’re even better equipped to make informed decisions as you whip up your Homemade Twix Bars. Enjoy crafting!
FAQs about Homemade Twix Bars
Creating your own Homemade Twix Bars can be a delightful and rewarding experience. But with any recipe, questions often arise. Here’s a friendly guide to some of the most common queries about making these delicious treats.
Can I make these without caramel candies?
Absolutely! If you want to skip the ready-made caramel candies, you can make your own using a simple recipe of sugar, corn syrup, cream, and butter. Cooking these ingredients on the stove until they reach the desired consistency can give you a more personalized caramel flavor. Just be sure to let it cool slightly before pouring it over your shortbread layer.
How do I store leftovers properly?
For those who manage to have any leftovers (though I doubt it), it’s crucial to store your Homemade Twix Bars correctly. Place the bars in an airtight container and store them in a cool, dry place. If you want to keep them fresh even longer, refrigerating them would work well, though you might want to let them sit at room temperature for a bit before enjoying, to allow the chocolate to soften slightly.
Can I use a different type of chocolate?
Certainly! While milk chocolate is classic for Homemade Twix Bars, you could get creative. Dark chocolate adds a rich depth, while white chocolate offers a sweeter twist. Just ensure that the chocolate you choose melts well, so you achieve that shiny coating and delightful crunch.
Feel free to experiment and personalize your Homemade Twix Bars according to your taste preferences!
Conclusion on Homemade Twix Bars
Creating your own homemade Twix bars is more than just a cooking project; it’s a delightful journey that fills your kitchen with sweet aromas and produces a treat that rivals the store-bought version. With layers of buttery shortbread, creamy caramel, and rich chocolate, these bars transform simple ingredients into something extraordinary. As you savor each bite, you’ll appreciate the craftsmanship behind your creation. Whether you’re making them for a special occasion or just to indulge yourself, this recipe is sure to become a beloved favorite. So roll up your sleeves, gather those ingredients, and enjoy the sweet satisfaction of homemade goodness!
Print
Chocolate Caramel Shortbread Bars
- Total Time: 1 hour
- Yield: 16 bars 1x
- Diet: Gluten-Free
Description
Rich and delicious chocolate caramel shortbread bars that are perfect for any occasion.
Ingredients
Scale
- 1 cup unsalted butter, softened
- 1/2 cup powdered sugar
- 1/4 teaspoon salt
- 1 teaspoon vanilla extract (optional)
- 2 cups all-purpose flour
- 11 ounces soft caramel candies
- 2 tablespoons heavy cream
- 1 1/2 cups semi-sweet or milk chocolate chips or wafers
Instructions
- Preheat the oven to 350°F (175°C) and line an 8×8-inch baking pan with parchment paper.
- In a bowl, cream butter and powdered sugar until fluffy. Mix in salt and vanilla, then gradually add flour to form a soft dough.
- Press the dough into the pan and bake for 20–22 minutes, or until edges are lightly golden. Let it cool completely.
- In a saucepan over low heat, melt caramels with heavy cream, stirring until smooth. Spread over cooled shortbread. Chill for 30 minutes.
- Melt chocolate in a microwave-safe bowl in 30-second intervals until smooth. Pour over set caramel and spread evenly.
- Chill for 30–60 minutes or until chocolate is set.
- Slice into bars using a warm, sharp knife. Store in the fridge for best texture.
Notes
- For a firmer texture, keep the bars refrigerated.
- Customize the toppings by adding nuts or sprinkles before the chocolate sets.
- Prep Time: 20 minutes
- Cook Time: 22 minutes
- Category: Dessert
- Method: Baking
- Cuisine: American
Nutrition
- Serving Size: 1 bar
- Calories: 250
- Sugar: 20g
- Sodium: 100mg
- Fat: 15g
- Saturated Fat: 9g
- Unsaturated Fat: 5g
- Trans Fat: 0g
- Carbohydrates: 28g
- Fiber: 1g
- Protein: 2g
- Cholesterol: 30mg